
Accessories
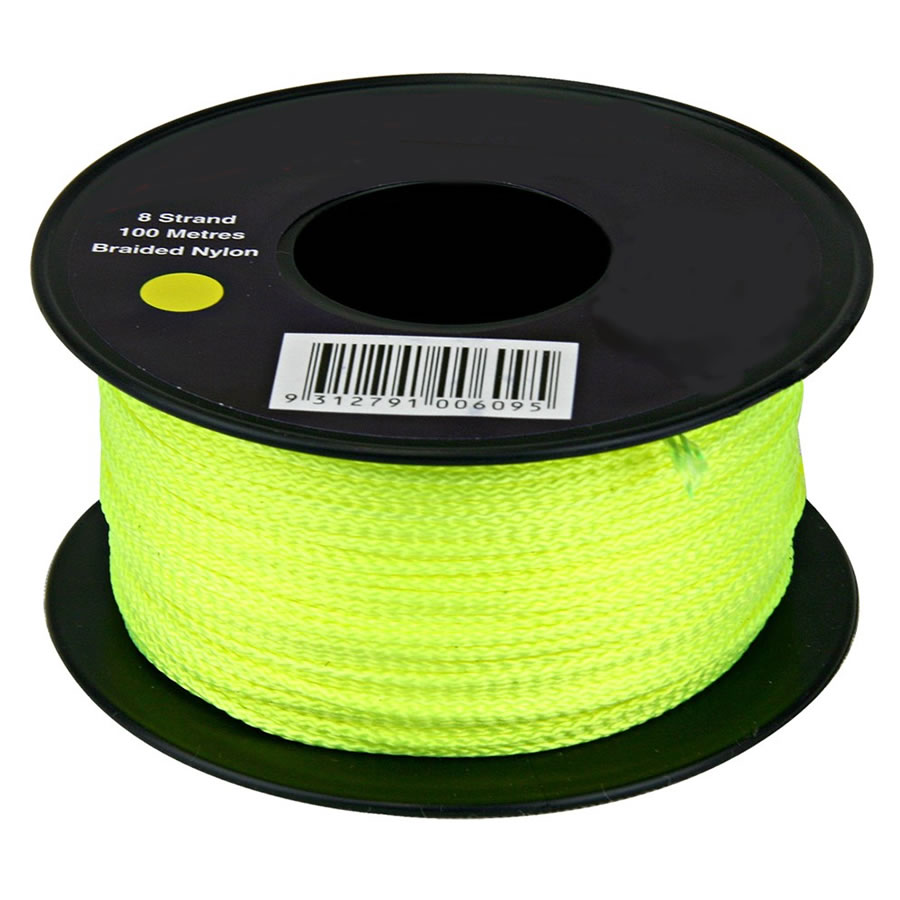
Builders String Line
An 8-strand braided nylon brickies line, 100 metres on the roll.
€19Delivery across Europe
View product
Reusable paver moulds in square, hexagon, irregular, zig zag and interlocking brick, plus the line and trowel that go with them. Priced in euro and delivered across Europe.
Premium Concrete Paver Moulds & Accessories for DIY & Professional Use
Elevate your landscaping projects with our durable, easy to use concrete paver moulds and accessories, perfect for creating custom driveways, patios, pathways, & more.
Whether you're a DIY enthusiast or a professional, our moulds make it simple to achieve polished, professional looking results every time.
Browse our collection today & start building your dream outdoor space!
Fast delivery direct to your door all across Europe
Search For A Product
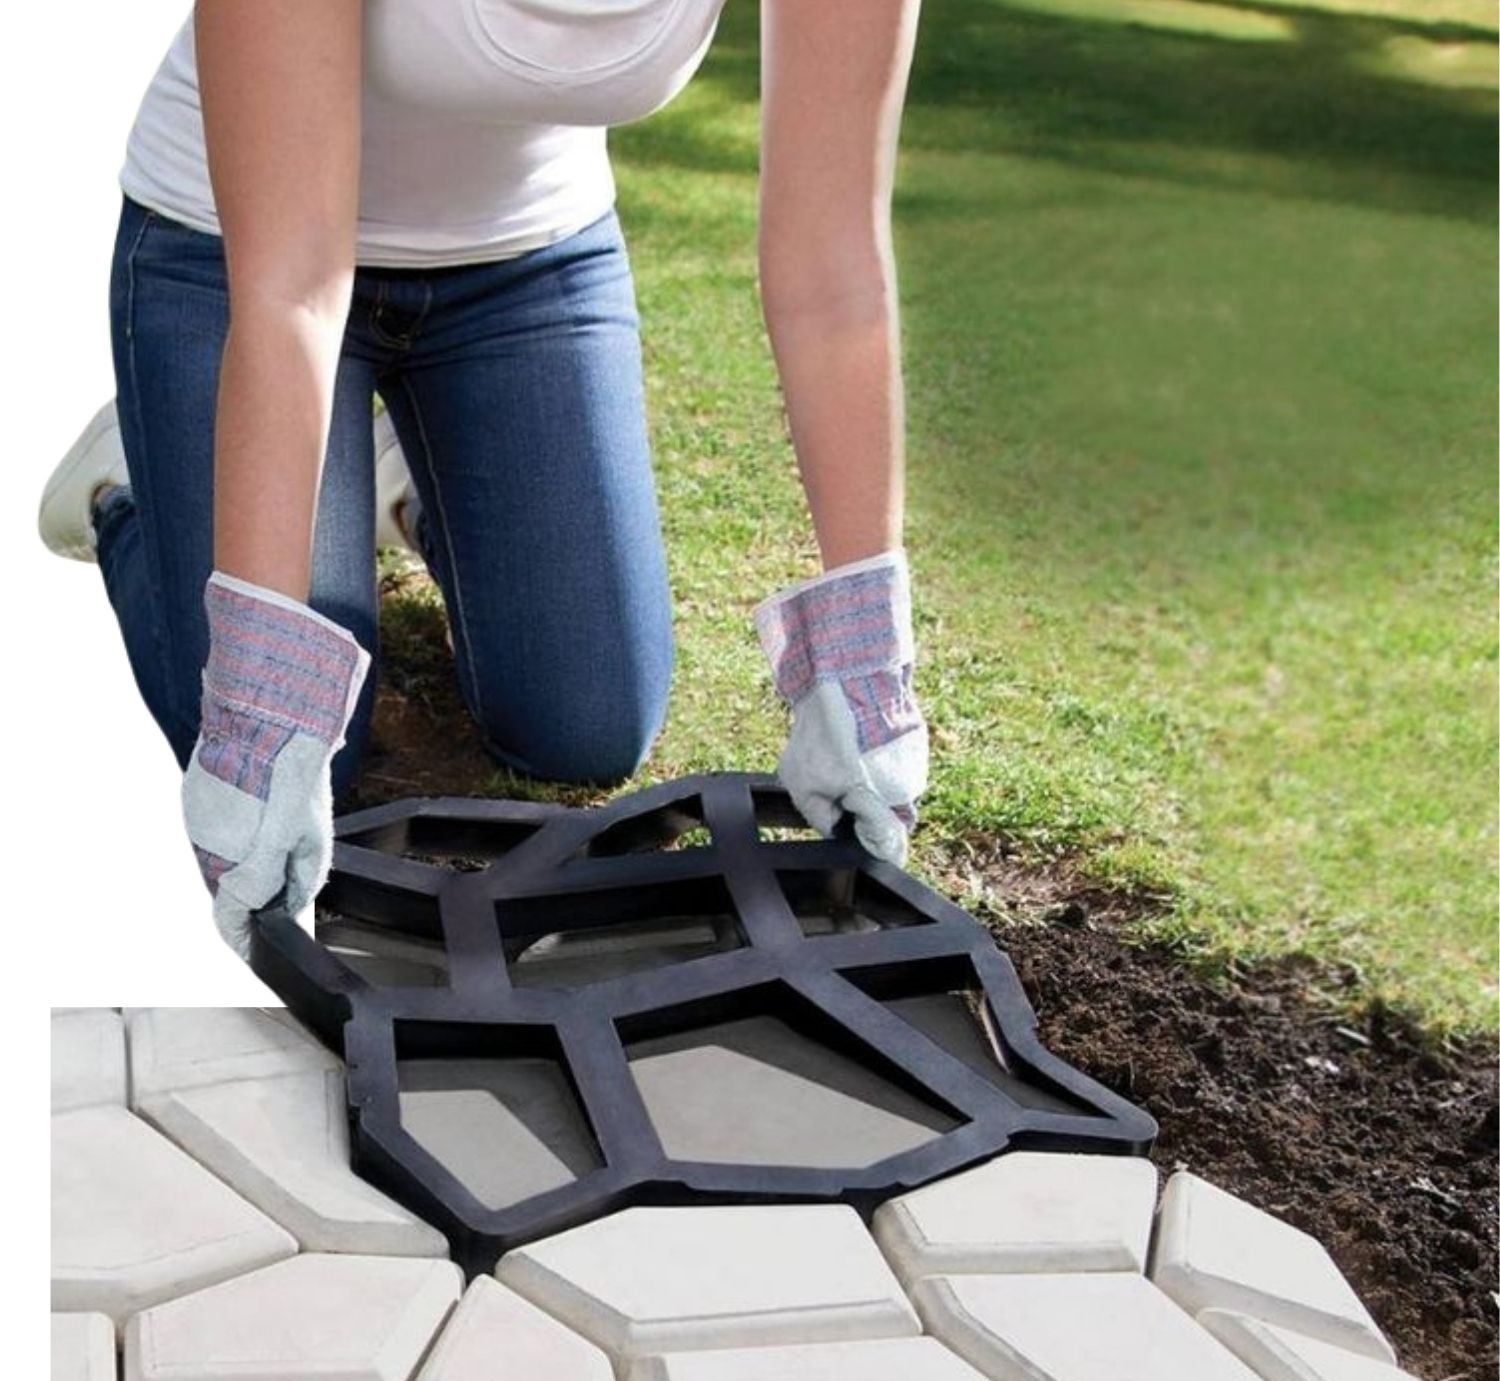
Paver Molds | AccessoriesSuper practical garden concrete mould that will help you create a sensational walkway or patio area easily and quickly
Garden stone moulds are made from heavy duty polycarbonate plastic and can be re-used over and over agin. right after you pour your first garden stepping stone
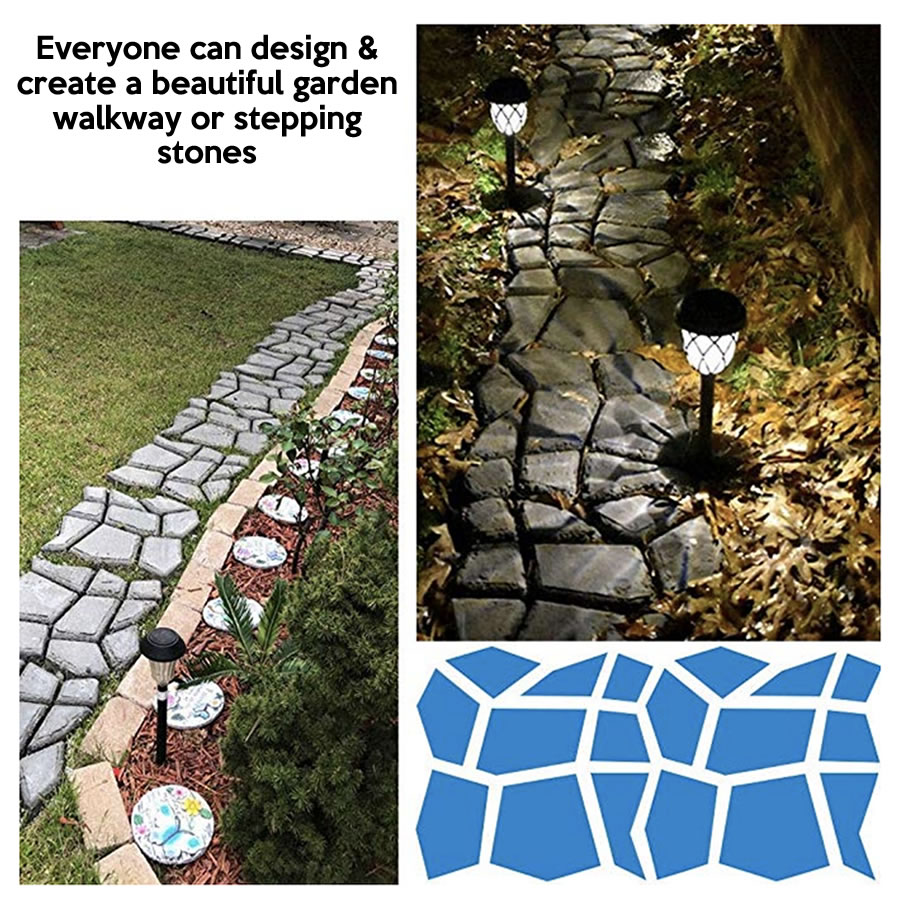
Increase the value of your property with beautifully created landscaped walk ways and path ways and patio areas without the huge expense of emplying trades people
If you are already looking into either adding or replacing your patio, driveway, or walkway, you have probably already encountered the plethora of options available in the world of paving materials, all of which have different levels of durability and require different kinds of maintenance.
Depending on what you need, all of these options have different advantages and disadvantages.
Cement pavers, for example, look great and come in a variety of shapes and sizes so that you can greatly enhance the overall look of your yard or garden. The downside to these pre-made pavers, however, is that they are quite expensive, and will add up very quickly if you need to buy a large or even moderate number of stones.
Most hardware stores will carry moulds for making cement pavers, but if you prefer you can make your own moulds out of plywood.
Keep in mind, however, that you need to leave your paver inside the mould for at least two weeks, so you need to have multiple moulds, ideally as many moulds as the number of pavers you want to create unless you want the process to take an enormous amount of time.
If you are happy to work on your project slowly and a little bit at a time, then being able to produce 10-20 pavers at a time might be enough.
The cost of a torn bag of cement (ask the manager for cement that has been processed and reduced; the clerks will try to sell you the more expensive stuff) that will produce 2 pavers costs a small fraction of what a ready-made paver of the same size costs at a builders merchant.
This means that making your own cement pavers costs considerably less per paver, and especially if you are undertaking a larger scale paving project, this can add up to an enormous amount of savings.
I use a flagstone mould that can make 10 stones at a time (it makes for slower work because I can only produce 10 stones every couple of weeks, but I have the time; if you want to produce more stones at a time you can easily buy extra moulds like this to speed up the process while still saving a lot of money).
Then I buy an 80lb bag of torn cement and this fills up the mould two and a half times (so yes, it is extremely cheap, and there is no reason not to undertake even a large-scale landscaping project so long as you have the time and energy for it). So long as you can lift and handle the 80lb bag of concrete, pouring concrete flagstones is a very simple process and you will be feeling like an expert at it in no time: there is really no need to hire a professional or pay for professionally made stones as the process is dead easy.
So in conclusion, if you have the motivation, the time, and the energy, you can create your own cement pavers for a fraction of the overall cost of buying ready-made ones. If you enjoy home improvement projects then you will have more fun this way, and in the end your property will feel more like your own because you have put the work into it yourself.
Ready to build a gorgeous path or patio without hiring a crew? With the right Concrete Paver Mold, you can pour professional-looking pavers right at home, on your schedule and at your pace. This guide walks you through everything you need to know about Cement Paver Molds and Concrete Stepping Stone Molds, from choosing shapes and sizes to mixing concrete, demolding, curing, sealing, and long-term maintenance. Let’s turn that blank outdoor space into something beautiful, one mold at a time.
Think of molds as your paver “printer.” They give you consistent shapes, crisp edges, and design freedom you simply can’t get with store-bought stones. You control the mix, the color, the texture, and the pattern. Plus, when the mold pays for itself after a few pours, you can keep creating matching pavers for borders, fire pit circles, or surprise design upgrades later on.
Not all molds are created equal. Here’s how to match the Concrete Paver Mold to your project vision.
Interlocking designs click together like puzzle pieces, keeping lines straight and gaps tight. They’re ideal for patios and paths where you want a tidy, geometric look with superior stability.
Prefer a natural, hand-laid vibe? Random stone patterns mimic the organic shapes you see in flagstone paths. They’re great for garden trails, side yards, and cottage-style patios.
Simple, round or square stepping stones are perfect for quick wins: a path across a lawn, access to raised beds, or a playful hop-stone trail for kids. These Concrete Stepping Stone Molds pour fast and demold easily.
Create clean transitions between lawn and mulch beds or define your patio’s perimeter. Edging molds help keep gravel and soil in place while framing your main pavers.
Some molds feature wood-grain, slate, or brick textures right in the form. Add integral color or a light antique wash after curing for insanely realistic finishes.
Material matters. It affects durability, flexibility, and how easy it is to release the paver.
Pros: Affordable, lightweight, quick to clean. Best for: Straight lines, interlocking patterns, beginners. Consider: Not as flexible as silicone, use a release agent for smoother demolding.
Pros: Durable with a bit of flex; handles detailed textures well. Best for: Repeated use, textured surfaces. Consider: Slightly heavier; store flat to maintain shape.
Pros: Superb release, fantastic for intricate shapes. Best for: Stepping stones, specialty designs, high detail. Consider: Typically higher initial cost but excellent demold performance.
A little planning goes a long way. Sketch the area, measure total square footage, then select your paver size. Divide area by the coverage of one mold pour to estimate how many pours you’ll need. If you want to speed things up, consider using two or three identical molds at once so you can leapfrog pours as they cure.
Before you pour your first paver, gather your essentials:
Even the best paver looks bad if the base is wrong. Carve out the area to a depth that accommodates your paver thickness plus a compacted gravel base (typically 3 to 4 in / 7 to 10 cm) and a thin sand leveling layer. Compact the gravel in 2-inch lifts, then screed the sand smooth. A flat, well-drained base prevents settling and frost heave.
Time to pour! Follow these steps for pro-level results on day one.
Clean and dry the mold. Lightly coat with a release agent, especially for detailed textures or new molds. Set the mold on your leveled, compacted sand or on a flat worktable if you’re casting offsite.
Follow the bag instructions. Aim for a consistency like thick oatmeal: wet enough to flow into corners, dry enough to hold shape when demolded. Add integral pigment now if you’re coloring the entire paver.
Shovel or pour the mix into the mold, slightly overfilling. Use a trowel to work concrete into edges and textures. Tap the sides of the mold or use a rubber mallet to vibrate out air bubbles.
Level the surface with a straight board or trowel. If you want a beveled edge, run an edger along the perimeter. For a non-slip texture, finish with a light brush stroke after initial set.
Allow the concrete to firm up until the surface dulls and fingerprints don’t sink deeply. Carefully lift the mold straight up. If it sticks, gently flex (silicone/PU) or tap the sides (plastic). Move the mold forward and repeat.
Curing is where the magic happens. Keep fresh pavers lightly misted or covered with plastic for at least 24 to 48 hours, then let them continue curing for several days. The longer the cure, the stronger the paver.
You can mold pavers directly in the final location (fast layout, instant gratification) or cast them separately and install later (more control, batch quality). Both work, pick the method that suits your schedule and space.
Set the mold on your prepared base, pour, lift, and move on. Great for long paths and consistent spacing. Just keep your base perfectly level as you go.
Use a flat table, pour in batches, and cure indoors or under cover. When ready, set pavers on a prepared base with a thin sand bed. This method is ideal for colored or specialty pieces.
Once pavers have fully cured, sweep fine sand into joints or use polymeric joint sand for better weed resistance. Apply a suitable concrete sealer for enhanced color, stain resistance, and easier cleaning. Choose matte for a natural stone look or gloss for a wet-stone sheen.
Install paver edging (plastic, metal, or poured border) to lock the field in place. A stable edge keeps everything tight through seasons and traffic.
Concrete is tough, but a little love goes a long way.
Polymeric sand helps, but if weeds pop up, remove them before they root deeply. For mossy, shaded areas, improve drainage and sunlight exposure or use a concrete-safe cleaner.
Stuck on style? Try these combinations and themes:
Use large rectangular Cement Paver Molds in cool gray with tight joints. Add a matte sealer for a smooth, architectural finish.
Choose random stone molds, warm integral color, and a soft antique wash. Plant creeping thyme in wider joints for a fairy-tale path.
Round Concrete Stepping Stone Molds with natural pebbles embedded on top. Space them through raked gravel for a calm, contemplative walkway.
Interlocking pavers in a herringbone layout with a contrasting border. Add string lights and planters to finish the look.
Calculate your patio’s square footage and divide by the coverage of one mold pour. If your mold covers 2 sq ft and your patio is 120 sq ft, you’ll need about 60 pours. Using multiple molds in rotation speeds up the process.
Absolutely. Add integral pigment to the mix for solid color, or apply a color wash after curing for depth and variation.
For standard walkways, a high-quality mix is enough. For driveways or heavy loads, consider fibers or light wire reinforcement, and ensure an excellent base.
Light foot traffic is often okay after initial curing (check your mix guidelines), but full strength takes longer. Let them cure thoroughly before placing heavy furniture or planters.
With proper care and release agents, quality molds handle many cycles. Clean after each use and store flat away from direct sun to extend life.
When you’re shopping, keep these criteria in mind:
Do you want square tiles, rectangles, natural stone patterns, or statement stepping stones? Match the mold style to your layout goals and yard scale.
Look for heavy-duty plastics, polyurethane, or thick silicone that resists warping and delivers clean edges.
Fine textures demand a mold that releases easily. Silicone excels here; plastic with a light release agent also performs well.
Check cleaning instructions and storage recommendations. Molds with reinforced ribs or thicker walls tend to last longer.
If you plan to use pigments, fibers, or surface hardeners, choose mold materials known to play nicely with enhanced mixes.
Concrete work is straightforward, but protect yourself:
Use a proper release agent, ensure the mold is clean, and let the concrete reach a firm initial set before lifting.
Tap or vibrate the mold after filling to release trapped air. Slightly wetter mixes often flow into details better.
Cracking typically points to a weak base, rushed curing, or mixes that are too dry. Reinforce edges and follow a steady curing routine.
Check your base level often and use spacers or string lines to maintain consistent gaps, especially with interlocking molds.
Drop a contrasting pigment into the top surface and swirl with a trowel to mimic natural stone veining.
Press decorative stones, glass beads, or metal medallions into the surface before final set. Seal thoroughly once cured.
Use larger joints filled with decorative gravel or permeable joint sand to promote drainage and reduce runoff.
We obsess over the little things so your project looks anything but “DIY.” Crisp edges, smart ribbing for rigidity, clean release, and a wide range of sizes and styles, our Concrete Paver Mold lineup helps you build a space you’ll be proud of. Whether you’re laying a modern patio, carving a woodland path, or crafting whimsical stepping stones, you’ll find the perfect fit here.
Want an easy win? Try this two-day stepping-stone path using our Concrete Stepping Stone Molds.
Concrete is long-lasting by design. To make your project even greener:
Rinse molds after each session. Avoid harsh scrubbing tools that can scuff detailed textures. Dry fully and store flat in a cool, shaded place. A little care now means many more pours later.
Build a 30-foot garden path with a single random stone mold in two weekends. Start with the walkway, then add a matching patio border later.
Batch-cast pavers in multiple natural tones. Mix and match for a subtle mosaic effect that looks custom, because it is.
Kids can help pour stepping stones and add handprints or dates (supervise and use safety gear). Seal them to preserve those memories for years.
Browse our collection of Concrete Paver Mold styles, including interlocking Cement Paver Molds and decorative Concrete Stepping Stone Molds. Pick your pattern, grab a bag of mix, and pour your first stone. That dream patio or winding garden path? It’s closer than you think.
Outdoor projects don’t need to be complicated to look incredible. With quality molds, a solid base, and a bit of creativity, you can craft paths, patios, and stepping stones that feel custom, because you made them. Choose the right Concrete Paver Mold, follow the steps above, and enjoy a space that’s as durable as it is beautiful. Ready to start? Your next favorite spot in the yard is waiting.
Clear information
The price on the page is the price at checkout, with delivery shown before you pay.
If a product detail is not published, ask us and we will verify it rather than estimate it.
European contact information and the registered company address are shown throughout the store.
About the store
We supply reusable concrete paver moulds and the accessories that go with them, online, for delivery across Europe. The store is a division of Caruso Consulting Co Ltd. Our role is to make the product, price, delivery and returns information clear before you order.
Got questions?
What is the best base material to use with Cement Paver Molds? The best base material for Cement Paver Molds is compacted gravel or crushed stone, followed by a sand layer. This ensures proper drainage, stability, and prevents the pavers from settling over time.
Can I use Concrete Stepping Stone Molds for creating a patio surface? Yes, Concrete Stepping Stone Molds are perfect for patios. Their versatile shapes allow you to create unique, modular patio floors, providing both aesthetic appeal and a solid, functional surface for outdoor dining or lounging areas.
How do I align Cement Paver Molds for a perfect finish? For a perfect finish, use a string line to guide your placement. Keep the pavers aligned with a spirit level and check for uniform spacing. The interlocking nature of Cement Paver Molds makes it easy to achieve a straight and clean look.
Can Concrete Stepping Stone Molds be used for creating a backyard path? Absolutely. Concrete Stepping Stone Molds are perfect for creating winding, organic-looking paths in your backyard. The unique shapes add visual interest and allow for easy walking through gardens or grass areas.
Are Cement Paver Molds durable enough for high-traffic areas? Yes, when installed correctly with proper base preparation and reinforcement, Cement Paver Molds create durable pavers that can withstand heavy foot traffic. Ensure adequate curing time for long-lasting, resilient surfaces.
How can I achieve a custom look with Concrete Paver Molds? You can customise Concrete Paver Molds by adding different textures, using coloured aggregates, or experimenting with concrete stains. This allows you to create unique patterns and finishes tailored to your specific landscape design.
How can Cement Paver Molds improve the aesthetic of my garden? Cement Paver Molds allow you to create uniform yet unique pavers that blend seamlessly with your garden design. The interlocking layout enhances visual interest and makes your outdoor space look more polished and professionally finished.
Can Concrete Paver Molds be used for both small and large projects? Yes, Concrete Paver Molds are highly versatile and can be used for both small garden paths or large driveways and patios. Simply adjust the layout and number of moulds used to accommodate the scale of the project.
How can I add colour to pavers made with Concrete Stepping Stone Molds? You can add colour by using integral pigments in the concrete mix. Alternatively, you can stain the surface after curing for a customised finish that complements your garden or outdoor area’s aesthetic.
Are Cement Paver Molds suitable for creating a patio in a small space? Yes, Cement Paver Molds can be used to create small-scale patios with a professional finish. The pavers' modular design ensures that even tight, constrained areas can be transformed into stylish, functional outdoor spaces.
How can I create a pattern with Concrete Stepping Stone Molds for my garden? Arrange the Concrete Stepping Stone Molds in a grid, herringbone, or random pattern to fit the style of your garden. You can also combine different moulds for a customised design that adds visual interest to your garden paths.
Are Cement Paver Molds suitable for creating a driveway? Yes, when properly reinforced, Cement Paver Molds can create strong, durable pavers that are ideal for light to medium traffic driveways. Proper installation and base preparation ensure a stable surface that can handle vehicle loads.
What is the best way to level pavers created with a Concrete Paver Mold? Ensure a level base by compacting the soil and screeding sand before placing the pavers. Use a rubber mallet to tap each paver gently into position, checking with a spirit level to keep everything uniform and stable.
Can Concrete Stepping Stone Molds be used for creating paths around trees? Yes, Concrete Stepping Stone Molds are perfect for creating custom paths around trees. The interlocking design allows for a flexible layout that adapts to the natural shape of your garden, while providing a stable, attractive path.
How do I prevent my Cement Paver Molds from sticking to the concrete? To prevent sticking, apply a light coat of mould release spray before pouring the concrete. This will ensure the pavers come out cleanly without damaging the edges, leaving you with a smooth, professional finish.
What makes a Concrete Paver Mold a cost-effective solution for paving? A Concrete Paver Mold reduces the need for costly pre-made pavers. You can make your own custom pavers using affordable materials, which cuts down on material costs and labour, saving money for large paving projects.
Are Concrete Stepping Stone Molds practical for creating a low-maintenance garden? Yes, Concrete Stepping Stone Molds create solid walking paths that minimise soil compaction in garden areas, making it easier to care for plants and reducing the need for excessive weeding or watering.
Can Cement Paver Molds help with the creation of curved paths? Yes, you can adjust the layout of Cement Paver Molds to follow a curved design. By shifting the position of each paver slightly, you can create smooth, flowing curves for garden paths, giving your outdoor space a more organic feel.
How long should I wait before removing pavers from a Concrete Stepping Stone Mold? Wait at least 24 to 48 hours for the concrete to set before removing the pavers. The concrete needs time to harden, ensuring the pavers stay intact without damage when you release them from the mold.
Is it easy to maintain pavers created with Cement Paver Molds? Yes, pavers made with Cement Paver Molds are low-maintenance. Simply sweep regularly and rinse off debris. You can also seal the surface to prevent staining and keep your pavers looking fresh for years.
Can a Concrete Paver Mold be used in areas with heavy foot traffic? Yes, when properly installed, Concrete Paver Molds create durable pavers that can handle high traffic. Using a solid base and proper reinforcement ensures long-term stability, even in busy garden areas or driveways.
How can I customise the look of pavers made with Concrete Stepping Stone Molds? You can customise pavers by adding decorative aggregates, using different concrete colours, or brushing on a textured finish before they set. This allows for a completely unique look tailored to your design.
Are Cement Paver Molds suitable for creating edging and borders? Cement Paver Molds work perfectly for creating neat, uniform borders around gardens, walkways, or patios. The pavers made from these molds are ideal for maintaining straight, well-defined edges, enhancing the structure of your outdoor spaces.
Can Concrete Stepping Stone Molds be used for creating decorative features? Yes, Concrete Stepping Stone Molds are ideal for making unique, decorative features like garden stepping stones or focal points in your landscape design. Their versatility allows you to experiment with textures and shapes for custom designs.
What is the advantage of using Cement Paver Molds for larger paving areas? Cement Paver Molds allow for consistent production of pavers, making large-scale projects more manageable. They also ensure uniformity across the entire space, which reduces the need for recalibration and makes installation more efficient.
How does a Concrete Paver Mold reduce installation time? A Concrete Paver Mold speeds up the process by allowing you to produce multiple pavers at once. The interlocking design enables quicker placement, cutting the time spent on layout by as much as 50% compared to traditional methods.
Can Concrete Stepping Stone Molds create unique garden pathways? Yes, Concrete Stepping Stone Molds are perfect for custom garden paths. The modular design lets you create organic, irregular layouts, giving your garden a natural, personalised feel while providing sturdy walking surfaces.
How does a Cement Paver Molds help with DIY paving projects? Cement Paver Molds simplify DIY paving by providing easy-to-use templates for creating pavers at home. They reduce the need for custom cutting, giving you uniform results and a professional look for any outdoor path or patio.
What is a Concrete Paver Mold used for in landscaping? A Concrete Paver Mold allows you to create custom pavers for paths, patios, and driveways. It helps achieve consistent shapes and sizes, reducing labour while ensuring a professional finish for your outdoor spaces.
Yes, we use industry-standard encryption and secure payment gateways to protect your information.


